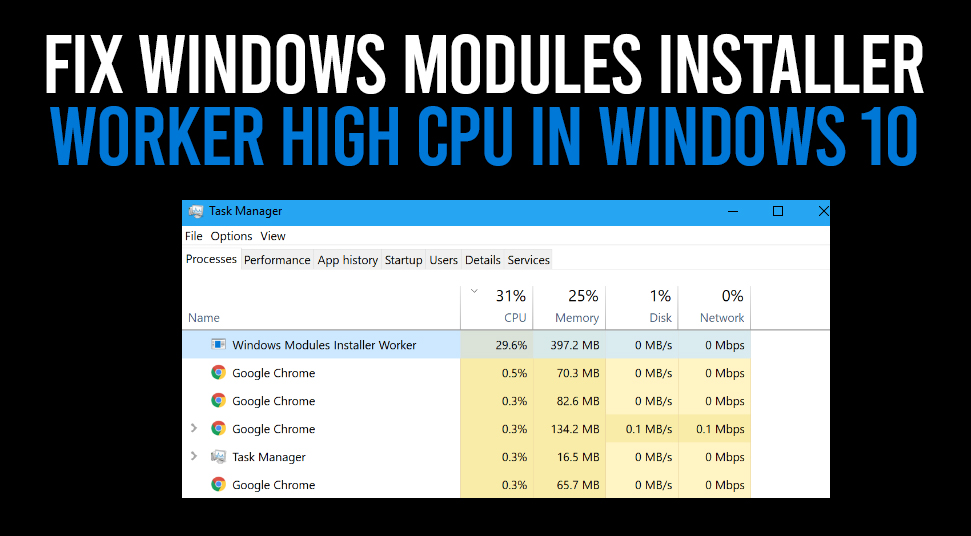
In the Windows 10 computer, there is a tool known as ‘Windows Modules Install Worker’. This tool takes up a huge percentage of CPU when it executes within the system. As this tool runs in the background, therefore even after closing the application, the CPU percentage remains high and the fan runs at full speed.
Since the ‘Windows Modules Installer Worker’ feature takes up most of the CPU resources, thereby hampering the overall performance of the computer and due to the generation of heat, the fan operates at optimal speed.
Reasons for the Windows Modules Installer Worker
The high CPU problem of the Windows Modules Installer Worker occurs during the Operating System update performing updates or repairs itself. When the computer connects to the Internet, next, in the background this tool will execute all the time and takes up CPU a significant amount of CPU time. This tool executes to look for any updates to the Operating System, then helps to download and install them to the computer automatically.
How To Rectify the Windows Modules Installer Worker Issue on Windows 10?
Here, you will get multiple methods regarding ways to fix the Windows Modules Installer Worker high CPU usage problem on the Windows 10 machine.
Alter the Windows Modules Installer Worker service to ‘Manual’
You will get the steps here, regarding ways to change the ‘Windows Modules Installer Worker’ service to ‘Manual’. To do that, follow the steps below.
- First, tap on the combination of ‘Windows + R’ key simultaneously, to open the ‘Run’ dialog box. Inside that dialog box, input the text “services.msc” on the empty beside the empty area and click on the ‘OK’ button.
- When you click on that button, next, a new window having the title ‘Services’ will appear. Within this window, there is a list full of all the services for various applications and hardware.
- Now, from that list, locate and double-click on the ‘Windows Modules Installer Worker’ service, to launch its ‘Properties’ window.
- Once a new ‘Windows Modules Installer Worker Properties’ dialog box comes up, next, go to the ‘Service type:’ and choose the ‘Manual’ option from the drop-down list. Then, click on the ‘OK’ button.
- Next, from the list within the ‘Services’ window, find and double-click on the ‘Windows Update’ service. This action will open the ‘Windows Update Properties’ dialog box.
- Repeat the fourth step of this section, once the properties dialog box of the ‘Windows Update’ service comes up.
Perform Clean Reboot of the Computer
The clean reboot process will restart all system files once again. Basically, a clean reboot will remove all the cookies and unnecessary files present within the machine. Therefore, doing this will prevent the high CPU usage problem with the Windows Modules Installer Worker service. The steps on how can you do is as follows.
- First, press both the keys ‘Windows + S’ together, in order to launch a default search section of the OS.
- Inside that section, input the following text ‘system configuration’ in the black area, then from the results page, locate and choose the ‘System Configuration’ option.
- As soon as you click on that option, then a new dialog box having the title ‘System Configuration’ will appear. Inside that dialog box, go to the ‘General’ tab and choose the same.
- Under the ‘General’ tab, select the ‘Normal startup’ option, then click on the ‘Apply’ and ‘OK’ buttons respectively.
- Finally, restart the computer, in order to apply any changes to it and check if this problem still persists or not.
Delete the SoftwareDistribution Folder
The new updates of the Windows OS are downloaded and stored in the SoftwareDistribution folder. Now, sometimes if the contains within this folder get corrupted, then the Windows Modules Installer Worker may trigger the high CPU usage due to constant checking for updates. The best answer to fix this issue is to delete the SoftwareDistribution folder. To do it correctly, follow the steps below:
- First, tap the ‘Cortana’ logo, to open the search section, in it, type the ‘services’ and then select the ‘Services’ option from the output page.
- Now, a new window with the name ‘Services’ will come up. Inside that window, locate the ‘Windows Update’ service and right-click on it.
- Once the popup list appears, next, choose the ‘Stop’ option to shut this service from executing.
- Next, from the taskbar locate and click on the ‘File Explorer’ directory. This action opens the new window, in it, go to the left pane and then under the ‘This PC’ section choose the ‘Local Disk (C:)’ option.
- Once a new page with a list full of all the contents inside the C drive will appear. Now, from that list, locate and double-click on the ‘Windows’ directory.
- At this time, there will be a list of all the system files and folders for the Windows OS. From the list of contents within ‘Windows’ folders, locate and select the ‘SoftwareDistribution’ directory, then click the ‘Delete’ key.
- When the deletion of the SoftwareDistribution folder is over, next restart the computer and see if this issue is present or not, during the update process.
Execute the Windows Troubleshooter
If the methods above are unable to resolve the ‘Windows Modules Installer Worker’ high CPU issue, then as a last resort all you can do is execute the ‘Windows Update Troubleshooter’. Here are the steps on how can you do it, so follow them accordingly.
- First, click the ‘Windows’ logo on the taskbar. This will open the ‘Start Menu’.
- Inside that menu, choose the ‘Gear’ above the ‘Power’ icon, to launch a new window with the heading ‘Windows Settings’.
- Inside that window, locate and choose the ‘Update and Security’ setting category. This action will open up a new page, in it, go to the left pane and choose the ‘Troubleshoot’ option.
- As soon as you click on that option, then move to the right panel of that page, having the name ‘Troubleshoot’. Now, inside that page locate and choose the option ‘Windows Update’.
- Once the chosen option expands, next, tap on the ‘Run the troubleshooter’ button. At this moment, the troubleshooter will scan the system for any problems with the Windows update files.
- When the scanning process is complete, next, click on the ‘Apply’ button to fix any issue in relation to the Windows Update.
- Lastly, restart the computer and then check if the high disk usage problem of the ‘Windows Modules Installer Worker; service has been resolved or not.